Have you ever had one of those days? Where you think you’ve done something, only to find out you haven’t? Well, this project is one of those "days". I was sure I’d already shared this project with you, but I don’t think I have. That’s a sure sign of getting old, isn’t it? Oh well, I’ll just call it too much on my plate. That’s my story and I’m sticking to it.
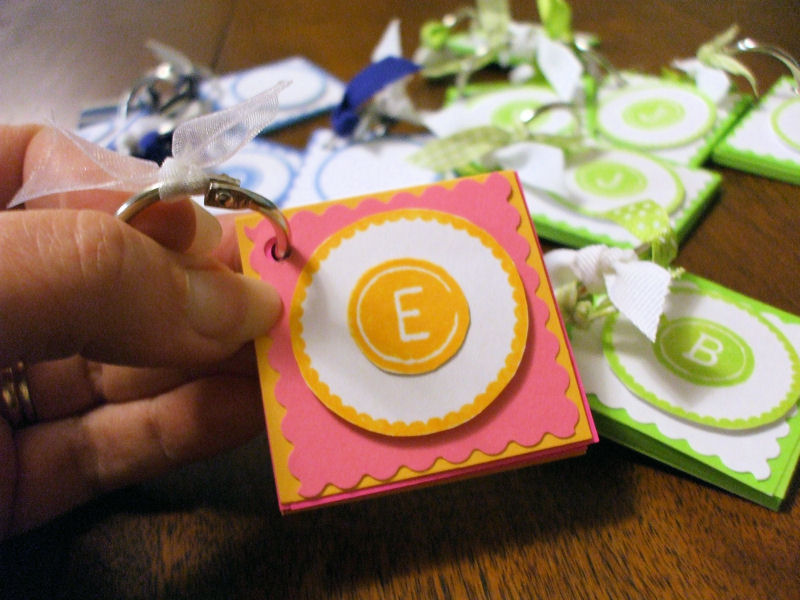
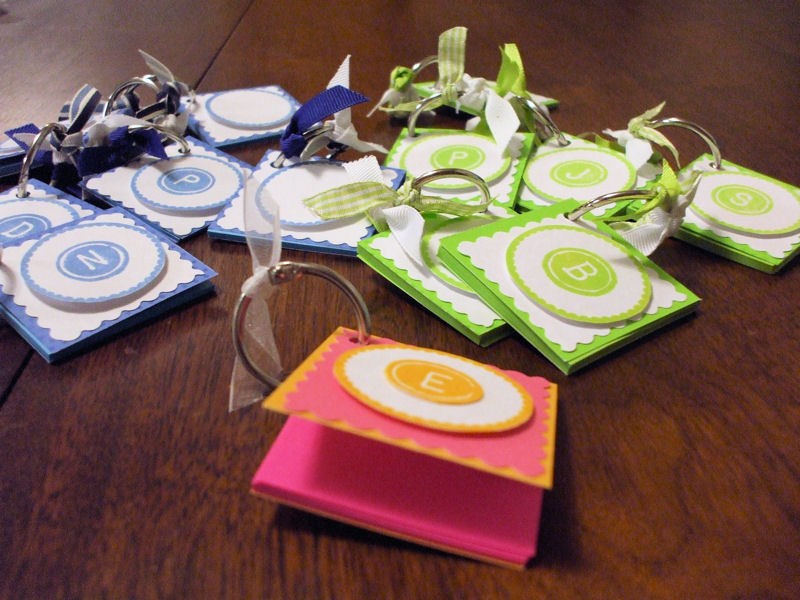
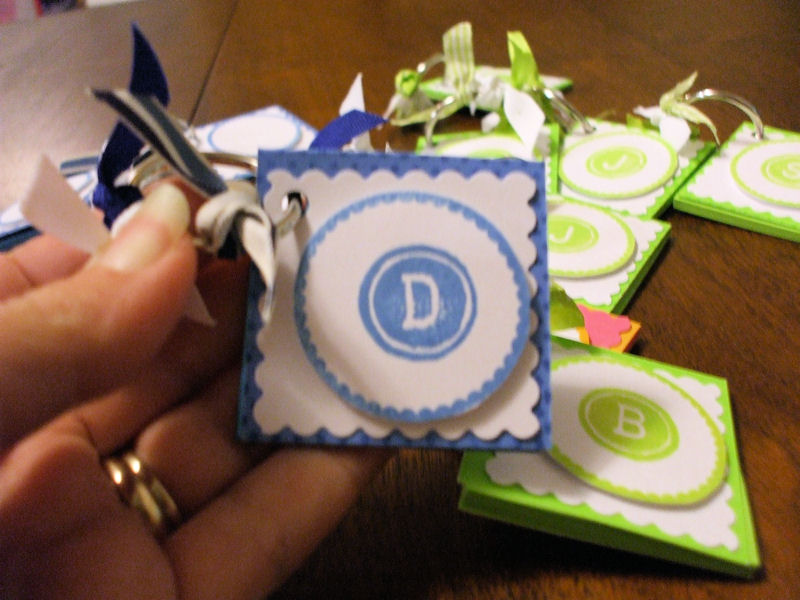
Okay, so moving on…this is such a cute little project! It’s perfect for a little ‘happy-happy’ (just a gift for no good reason) or for a tag on another gift. Two of these little beauties will go to my 2 Secret Sisters. Two, you ask? Yes, one of our group moved out of state and I’ve taken on her Secret Sister as well. So I get to make 2 persons happy – blessed me! Several of the keychains pictured were made as thank you gifts for a recent Close To My Heart order. I like to give everyone who orders a little something to thank them for supporting me and my business.
Honestly, these post it note keychains couldn’t be easier. Simply pick up your favorite sticky notes from the store – they come in so many colors! Section the sticky notes into smaller chunks – 25-50 sheets each. No need to count, just estimate. Use a little snippet of cardstock to cover the smaller notes. I scored my cardstock twice in the middle, to make a spine.
Secure the sticky note pad into your cover with a strong adhesive. I know this will be a shock, but I used my ATG. LOVE that thing! Use your Crop-A-Dile to punch a hole in the corner and thread a loose leaf binding ring
Okay, now is the time to embellish! You may want to use a monogram, flowers, or other stamped images. Something three- dimensional would be fun also! Tie a little ribbon on the ring and you’re done! A quick and easy ‘happy-happy’ for someone special in your life.

Thanks for stopping by! Go alter something!

Hey very nice site!! Man .. Excellent .. Superb .. I will bookmark your blog and take the feeds additionally?I am glad to find a lot of helpful information right here within the submit, we’d like develop more techniques on this regard, thanks for sharing. . . . . .
Hi Shannon,
Thanks! 🙂 You could *probably* tear the note pad into smaller segments and punch through them a bit at a time. Or a paper/manual drill would work great.
The main issue is that the stack of post-its plus the cardstock cover is pretty think.
HTH!
Candy
Just wanted to say that is too cute! Can you hole puch with something other than a “crop-o-dile”? This is a tool I don’t have :(. Might have to look into it now LOL.
I loved mine!! Clipped it to my purse handle. Perfect place for it if you need to write something down in a hurry!
Thanks Candy!!